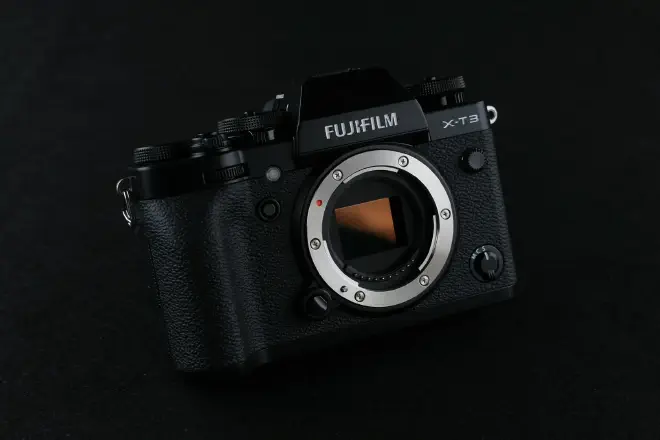
Videography setting for my Fujifilm X-T3

Table of Contents
After research1 2, here are my videography settings. They are organized into four major sections: memory card, audio, video and each shoot.
Besides the last section, they are do-once and forget. Last section is setup prior to each shoot session.
Memory cards #
- Use rating V60 or higher for video. For example, Sony Tough-M 128GB UHS-II, V60.
Audio #
Settings for audio:
- Noise from SD card 3. Use an external, powered microphone.
- MOVIE SETTING 4/5. AUDIO SETTING.
- MIC LEVEL LIMITER. ON.
- WIND FILTER. OFF.
- LOW CUT FILTER. OFF.
If using a hot-shoe-mounted, powered microphone:
- MOVIE SETTING 4/5. AUDIO SETTING.
- INTERNEL MIC LEVEL ADJUSTMENT. AUTO.
- EXTERNAL MIC LEVEL ADJUSTMENT. AUTO.
On my external, powered microphone:
- Turn on low-pass filter.
- Turn on +10 dB boost.
If using a lavier microphone:
- MOVIE SETTING 4/5. AUDIO SETTING.
- INTERNEL MIC LEVEL ADJUSTMENT. AUTO.
- EXTERNAL MIC LEVEL ADJUSTMENT. MANUAL. Adjust so that on-screen, real-time level is middle between 0 and -20 dB.
Video #
Video settings:
- Live histogram in EVF.
- SET UP.
- SCREEN SET-UP.
- SCREEN SETTING 2/3.
- DISP. CUSTOM SETTING.
- DISPLAY CUSTOM SETTING 1/4.
- Make sure HISTOGRAM is checked.
- MOVIE SETTING 1/5.
- FILM SIMULATION. Eterna/Cinema.
- MOVIE SETTING 2/5.
- HIGHLIGHT TONE. -1.
- SHADOW TONE. -1.
- SHARPNESS. -2.
- NOISE REDUCTION. -42.
- MOVIE SETTING 3/5.
- MOVIE AF MODE. AREA.
- FACE/EYE DETECTION SETTING. FACE DETECTION ON. EYE AUTO.
- MF ASSIST. FOCUS PEAK HIGHLIGHT. RED(HIGH).
- 4K MOVIE OUTPUT. SD 4K HDMI 4K.
- MOVIE SETTING 4/5.
- ZEBRA SETTING. ZEBRA RIGHT.
- ZEBRA LEVEL. 95%.
- MOVIE SETTING 5/5.
- TALLY LIGHT. FRONT ON REAR ON.
Note: On some lens, turn on IS mode with a physical selector button on the lens.
4K #
- MOVIE SETTING 1/5.
- MOVIE MODE. 4K 16:9. 24P. 400 Mbps.
- H.265(HEVC)/H.264. H.265(HEVC).
- MOVIE COMPRESSION. ALL-Intra.
- FILM SIMULATION. Eterna/Cinema.
- DYNAMIC RANGE. DR400. Note: this sets a minimum of ISO 640.
4K smaller file size #
Smaller file size.
- MOVIE SETTING 1/5.
- MOVIE MODE. 4K 16:9. 29.97P. 200 Mbps.
- H.265(HEVC)/H.264. H.265(HEVC).
- MOVIE COMPRESSION. Long GOP.
- FILM SIMULATION. Eterna/Cinema.
- DYNAMIC RANGE. DR100.
Each shoot #
Live view #
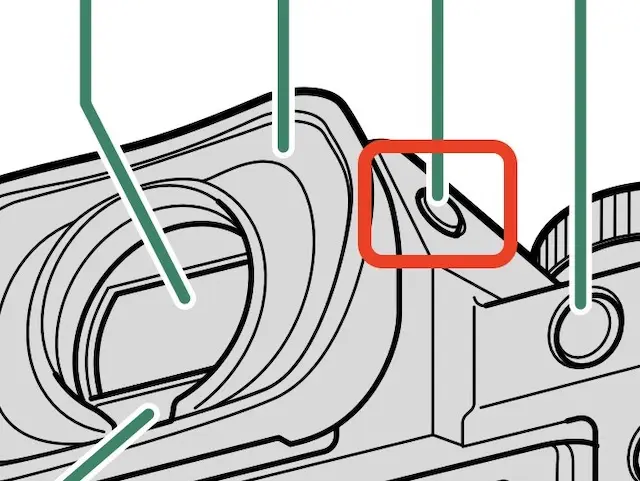
LCD ONLY. Toggle VIEW MODE via the small button on the right side of the EVF eye cup.
Face/eye detection #
Turn on for scenes with people as main subject. Otherwise, turn off.
- MOVIE SETTING 3/5.
- MOVIE AF MODE. AREA.
- FACE/EYE DETECTION SETTING.
- Turn on. FACE DETECTION ON. EYE AUTO.
- Turn off. OFF.
Power management #
- SET UP. POWER MANAGEMENT.
- AUTO POWER OFF. OFF or 5 MIN.
- PERFORMANCE. BOOST.
- Not on X-T3. EVF/LCD BOOST SETTING. EVF FRAME RATE PRIORITY.
- Not on X-T3. AUTO POWER OFF TEMP. HIGH.
SD Card (memory card) #
- SET UP. SAVE DATA SET-UP.
- SELECT SLOT([Camcorder icon]SEQUENTIAL). SLOT 2. Or select the slot that has the fast card.
White balance #
Either use a preset white balance matching the scene or take a pic of a piece of white paper or gray card lit from lights in the scene 1. Never use AUTO. To take a pic of paper/card:
- MOVIE SETTING 1/5. WHITE BALANCE. CUSTOM 1. Take a pic of the paper/card. Okay to adjust exposure triangle to get a properly exposed reference shot.
Exposure triangle #
- If 24P, set shutter speed to 1/48.
- First set to 1/30.
- Then use back thumb dial to set to 1/48.
- If 30P, set shutter speed to 1/60.
- Set aperture to largest apeture.
- Set ISO to AUTO.
- If live view histogram still too bright:
- Add a ND filter
- Adjust aperture to a smaller one.
Changelog #
- 2025-12-10. Clarify instructions for Live histogram in EVF.
Cover photo by Mulyadi on Unsplash
Fujifilm Camera Video Guide for Beginners https://youtu.be/QN1XTx-khuc ↩︎ ↩︎
Fujifilm X-T3 Cinematic Video Settings 4K https://youtu.be/3BA0FtB4NXM ↩︎ ↩︎
Best memory cards Fujifilm X-T3 https://alikgriffin.com/best-memory-cards-fujifilm-x-t3/ ↩︎